
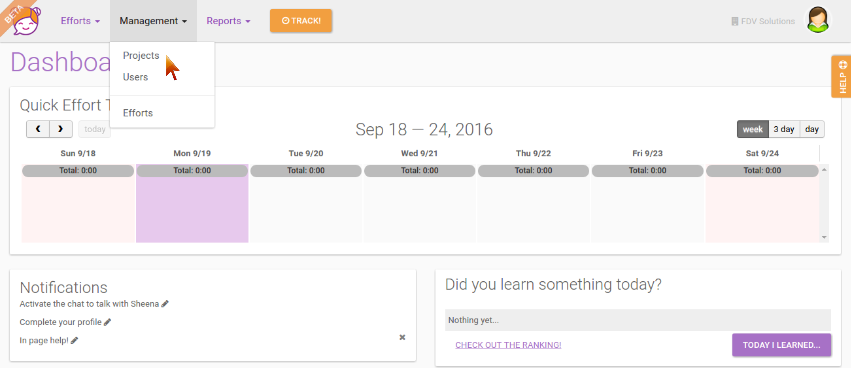
To create new projects go to the “Management” Menu. Click on "Projects":
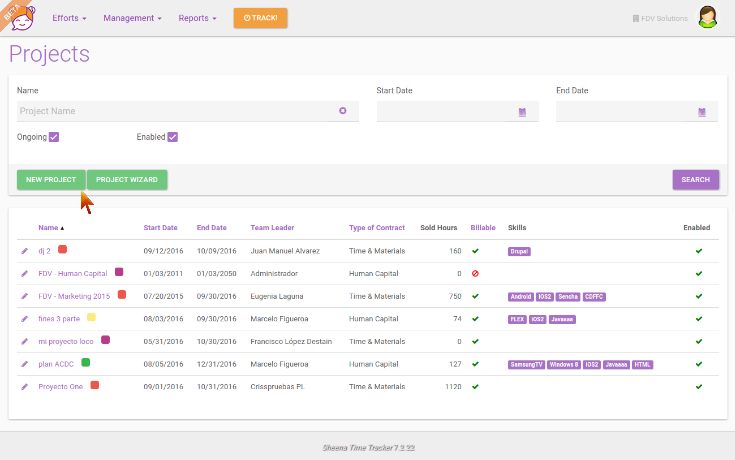
Create a new project. Go to "New Project":
Required Data
Enter the required data for the project. The creation of projects has 3 windows. We will hereby explain each field:
1. Basic Information:
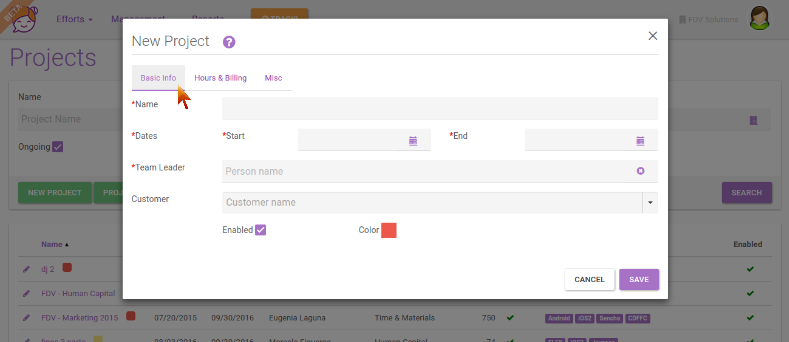
Project/Name: This is the name by which the project will be identified. Project names in Sheena cannot be repeated to ensure traceability
Project/Start: It is the start date of the project.
Project/End: It is the end date of the project. This date can be modified at any time, but you should bear in mind that this might affect the reports.
Project/Team Leader: It is the person in charge of the project follow-up. This person can assign and revoke people and will also receive notifications and hour reports related to the project. It can be the person creating the project or it can be used to assign another person previously added to the Company (Adding a new user in Sheena).
Project/Customer: This field is useful if there is one client with more than one project. It works as a grouper that allows us to have reports by client.
Project/Enable: When clicking on this checkbox the load of efforts will be enabled on the project. When unclicking the project it goes suspended or disabled, that is, no hours can be loaded.
Project/Color: Each project can be identified with a specific color for a quicker identification. This can be modified at any time.
2. Hours & Billing:
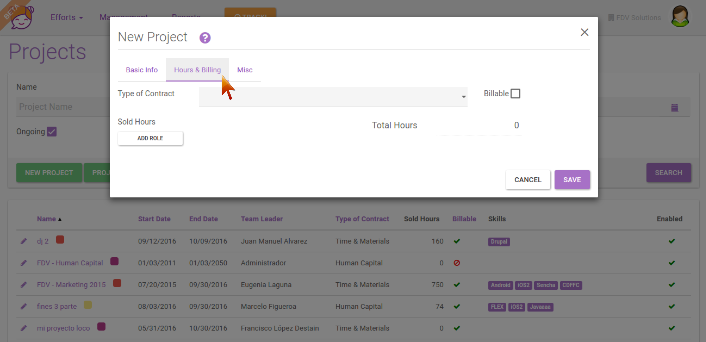
Project/Type of Contract: It is the type of commercial agreement that you have with the client of the project, which allows us to later have a follow-up of the projects by type of contract.
Project/Billable: It indicates whether a project will be billable or not, this allows us to get statistics of the % of people and hours assigned to non-billable projects. Examples of non-billable projects can be the internal projects of the company, which can also be managed by Sheena.
Project/Sold Hours: This field displays the total of hours sold or forecasted for the project. They go summarizing as you add roles with the forecasted hours per role.
Project/Add role: In This field some of the pre-loaded roles for the organization can be selected and you can load the estimated total hours for that role. As hours and roles are added, the field Total Hours will go adding up. To learn how to add new roles or eliminate the ones that don’t apply to your organization, see here: Settings/Roles
3. Miscellaneous (Others):
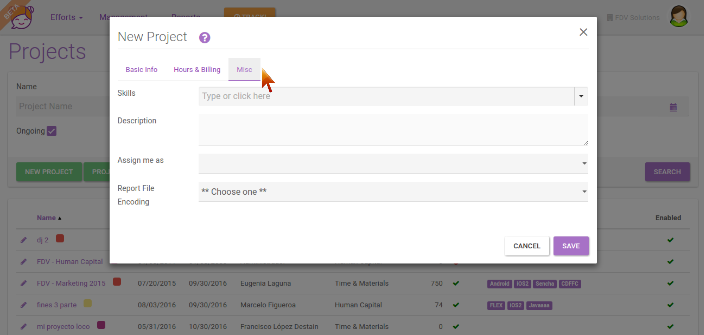
Project/Skills:In this field, the skills related to the project can be selected (or specific competences) for example Python, iOS, React, Scrum, etc. To learn how to add new skills or eliminate the ones that don’t apply to your organization, see here: Settings / Skills
Project/Description: This field allows us to add a brief description of the project.
Project/Assign me as: This field allows the creator of the project to auto assign the corresponding role so that s/he can load hours to the project. Example, as the creator of the project you can be the Team Leader, but you can also assign yourself as the Technical Leader of the project. For further information see How to create assignments in Sheena
Project/Report File Enconding: This feature allows us to choose the codification corresponding to reports in languages with special characters.
0 Comments